Cannabis Growth Stages: Pro Tips for Success
Understanding the cannabis growth stage is fundamental to becoming a successful cultivator. Whether you’re a beginner exploring indoor gardening or an experienced grower optimizing your yields, mastering each phase of development transforms your entire operation. Cannabis plants progress through distinct biological stages, each with unique requirements for nutrients, light, humidity, and care. This comprehensive guide breaks down every growth stage and provides actionable strategies to maximize your success at every step.
The journey from seed to harvest typically spans 3-8 months, depending on your strain and growing conditions. Like any significant undertaking, success requires planning, attention to detail, and a commitment to continuous improvement. Much like the personal growth journey, cultivating cannabis demands patience, consistency, and willingness to learn from both successes and setbacks. This guide equips you with evidence-based strategies and practical wisdom to navigate each cannabis growth stage confidently.
Germination and Seedling Stage: Building Your Foundation
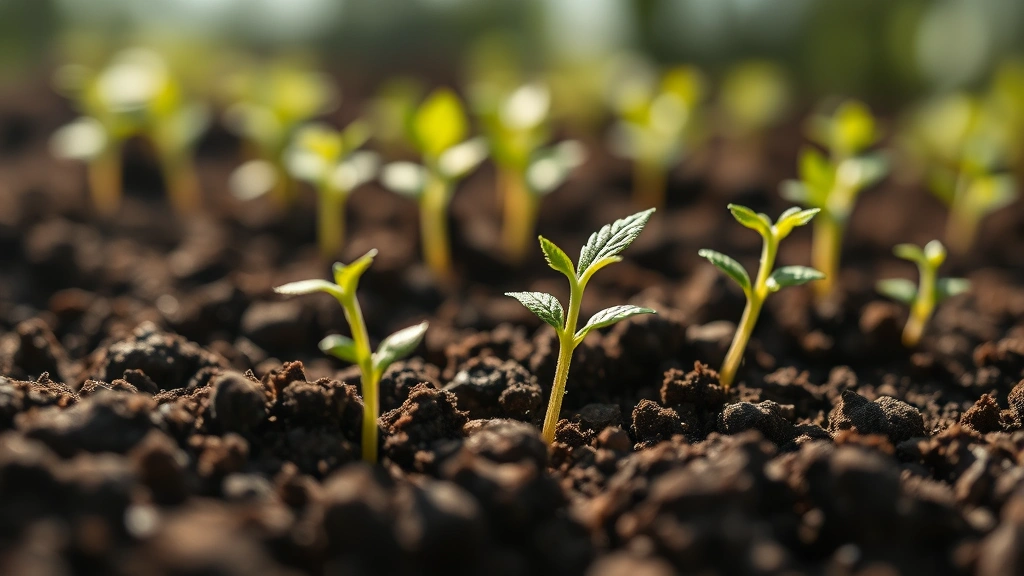
The germination and seedling stage represents your first critical cannabis growth stage, lasting approximately 7-10 days for germination and 2-3 weeks for seedling development. This phase determines whether your entire crop thrives or struggles from the start. Success here is non-negotiable—a weak seedling rarely recovers to become a productive plant.
Begin with quality seeds from reputable sources. The paper towel method remains industry-standard: place seeds between moistened paper towels, keep them in darkness at 70-75°F, and monitor daily for taproot emergence. Once the white taproot appears (typically 3-7 days), carefully transfer the seed into your growing medium with the taproot pointing downward. This simple technique has a 90%+ success rate when executed properly.
Seedlings demand gentle, indirect light for their first 2-3 weeks. LED grow lights positioned 24-30 inches above seedlings prevent the common problem of stretching—where plants grow tall and thin seeking light. Maintain 16-18 hours of light daily during this cannabis growth stage. Temperature should remain consistent at 70-77°F, as fluctuations stress delicate seedlings.
Watering during the seedling stage requires restraint. Overwatering causes damping-off disease and root rot. Water only when the top inch of soil feels dry. Use distilled water or let tap water sit 24 hours to allow chlorine to evaporate. Seedlings have minimal nutrient requirements; plain water suffices for the first 2-3 weeks before introducing quarter-strength fertilizer.
Many growers reference motivation strategies when discussing consistency in cultivation—the daily attention seedlings require builds the discipline necessary for successful growing. Establish your monitoring routine early and maintain it throughout all cannabis growth stages.
Vegetative Stage: Building Plant Structure and Strength
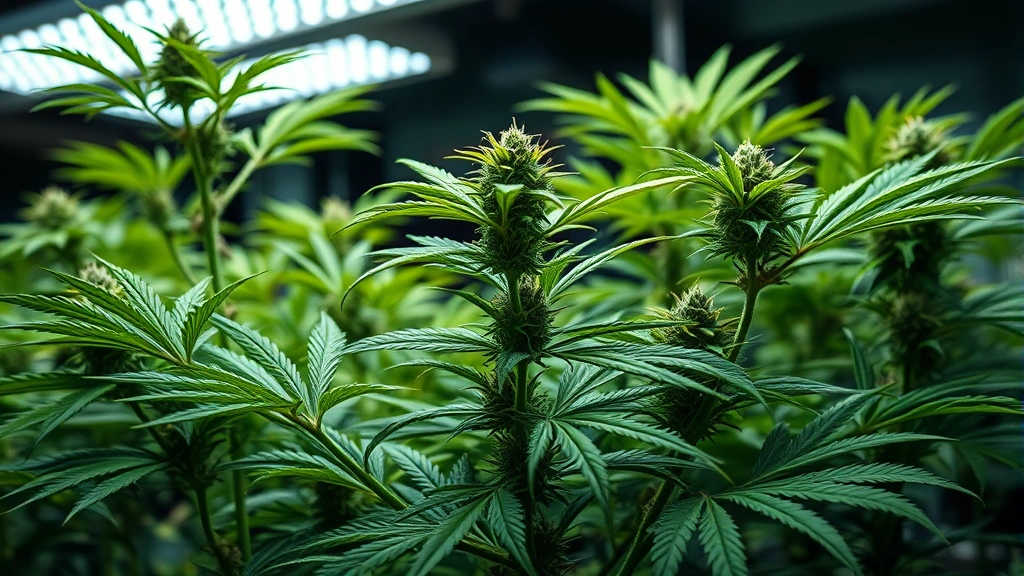
The vegetative stage represents the longest cannabis growth stage for most cultivators, lasting 3-16 weeks depending on your goals and strain. During this phase, plants focus entirely on developing stems, branches, and foliage—the structural foundation supporting future flower production. This stage demands abundant light, nitrogen-rich nutrients, and active growth management.
Light intensity increases dramatically during vegetative growth. Most cultivators use 18-24 hours of daily light during this cannabis growth stage, with 18 hours being the industry standard. Position LED lights 18-24 inches from the canopy, adjusting as plants grow. Light intensity should reach 400-600 μmol/m²/s at the leaf surface—most quality LED panels achieve this with proper positioning.
Nutrient requirements shift significantly once plants enter vegetative development. Introduce a balanced vegetative fertilizer with higher nitrogen content (the first number in N-P-K ratios). Follow manufacturer recommendations, typically feeding every watering or every other watering depending on your growing medium. Monitor leaves for deficiency signs: yellowing lower leaves suggest nitrogen deficiency, while purple-tinged leaves indicate phosphorus deficiency or temperature stress.
Temperature and humidity optimization during this cannabis growth stage accelerates growth dramatically. Maintain 70-80°F temperatures with 40-60% relative humidity. Ensure adequate air circulation with oscillating fans to strengthen stems and prevent fungal issues. Many growers increase carbon dioxide (CO2) to 1200-1500 ppm during vegetative stage—though this requires sealed growing environments and monitoring equipment.
Training techniques maximize productivity during the vegetative cannabis growth stage. Low-stress training (LST) involves gently bending and tying branches to create a flat canopy. Topping removes the main stem’s growing tip, forcing the plant to develop multiple main colas instead of one. Defoliation (removing large fan leaves) improves light penetration to lower branches. These techniques increase yields by 20-40% when executed properly, though they extend vegetative duration by 1-2 weeks.
Pre-Flowering Transition: The Critical Shift
The pre-flowering transition represents a subtle yet crucial cannabis growth stage lasting 1-2 weeks. During this phase, plants receive signals (typically reduced light duration) that trigger hormonal shifts preparing for reproduction. Understanding this transition prevents common mistakes and optimizes flowering success.
For photoperiod-dependent strains, reduce light duration from 18 hours to 12 hours daily to initiate pre-flowering. This 12-hour light/12-hour dark cycle triggers flowering in most cannabis varieties. Autoflowering strains, conversely, enter this cannabis growth stage automatically based on age (typically 3-4 weeks after germination) regardless of light schedule.
During pre-flowering transition, plants often display rapid growth spurts—sometimes doubling in height over 1-2 weeks. This “stretch” occurs as plants elongate before committing energy to flower production. Adjust light positioning to maintain optimal distance as plants grow. Many growers increase phosphorus and potassium slightly during this cannabis growth stage to prepare plants for flowering’s nutrient demands.
Environmental adjustments during pre-flowering optimize subsequent flowering. Reduce relative humidity from 50-60% to 40-50% to prevent mold and bud rot during the moisture-intensive flowering stage. Maintain temperatures between 65-75°F, slightly cooler than vegetative stage. This temperature reduction enhances terpene production—the aromatic compounds determining strain flavor profiles.
Like setting goals effectively, establishing proper pre-flowering conditions establishes the framework for subsequent success. The investments made during this cannabis growth stage directly influence flowering quality and yield.
Flowering Stage: Maximizing Yield and Quality
The flowering stage represents the ultimate cannabis growth stage, lasting 6-12 weeks depending on strain and environmental conditions. This phase demands precision and attention—small mistakes compound into significant yield or quality losses. During flowering, plants redirect all energy toward producing resinous flower buds containing cannabinoids and terpenes.
Light requirements during flowering differ fundamentally from vegetative stage. Maintain the 12-hour light/12-hour dark cycle consistently—even brief light interruptions during dark periods stress plants and can trigger hermaphroditism or stunted bud development. Use blackout curtains or completely sealed growing spaces to maintain darkness integrity. Light intensity remains critical: 600-1000 μmol/m²/s at the canopy optimizes bud density and resin production.
Nutrient profiles shift dramatically during this cannabis growth stage. Reduce nitrogen while increasing phosphorus and potassium to support flower development. Most growers switch to dedicated flowering fertilizers with P-K ratios of 1:2 or 1:3. Feed every watering or every other watering, monitoring for deficiency signs. Calcium and magnesium supplementation becomes increasingly important—many flowering problems stem from secondary nutrient deficiencies rather than primary nutrients.
Environmental management during flowering determines final product quality. Maintain 60-70°F temperatures with 40-50% relative humidity. Higher humidity increases bud rot and powdery mildew risk. Adequate air circulation remains essential—stagnant air pockets create moisture accumulation and fungal problems. Many experienced growers run nighttime temperatures 5-10°F cooler than daytime to enhance color development and terpene production.
Pest and disease management intensifies during this cannabis growth stage. Spider mites, thrips, and fungal infections can devastate flowering plants. Implement integrated pest management (IPM) strategies: regular inspections, predatory insects, neem oil sprays, and sulfur dust applications. Prevent problems rather than treating them—infected buds cannot be salvaged and represent total yield loss.
Water management during flowering requires careful attention. Plants consume more water as they develop buds. Maintain soil moisture without waterlogging—overwatering reduces oxygen availability and encourages root diseases. Many growers adjust watering frequency to every 2-3 days rather than daily, allowing soil to dry slightly between waterings.
Ripening and Harvest: Timing Perfection
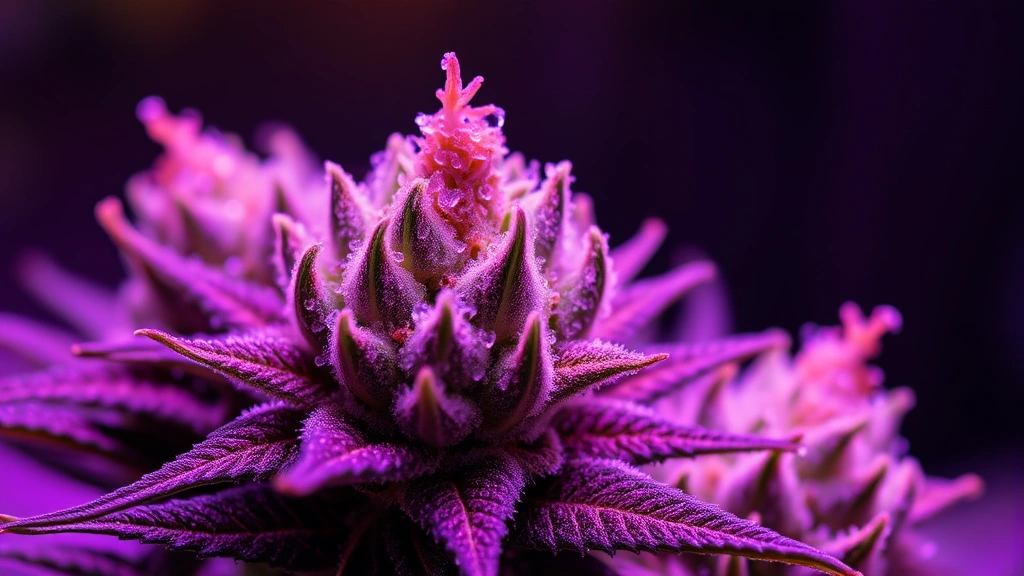
The ripening and harvest phase concludes the entire cannabis growth stage cycle. Timing harvest correctly determines final potency, flavor profile, and overall quality. Harvest too early and cannabinoids remain underdeveloped; harvest too late and degradation reduces potency. Most strains reach peak ripeness 8-10 weeks into flowering, though genetics vary significantly.
Monitor trichome development to determine harvest readiness. Trichomes are tiny, mushroom-shaped resin glands covering buds. Use a jeweler’s loupe or digital microscope to examine trichome color. Clear trichomes indicate immaturity; cloudy/milky trichomes suggest peak potency and THC content; amber trichomes indicate degradation toward CBN (which produces couch-lock effects). Most growers target 70-80% milky trichomes with 10-20% amber for balanced effects.
Pistil color provides a secondary ripeness indicator. Pistils are thin hair-like structures covering buds. Fresh pistils appear white; mature pistils darken to orange or brown. Most growers harvest when 70-90% of pistils have darkened, correlating with peak cannabinoid development during this final cannabis growth stage.
Prepare for harvest by flushing plants 1-2 weeks before anticipated harvest date. Flushing involves watering with pH-balanced water only (no nutrients) to remove excess salts from soil and plant tissues. This practice improves final flavor and smoothness—many connoisseurs credit flushing with superior smoking experience.
Harvest technique impacts final quality significantly. Use sharp, clean scissors to cut branches, handling buds minimally to preserve trichomes. Hang-drying remains superior to other methods: suspend branches upside-down in darkness at 60-70°F with 45-55% humidity for 7-14 days. Proper drying develops flavor complexity and prevents mold formation.
Curing after drying completes quality development. Place dried buds in glass jars, opening lids daily for 15 minutes to release moisture. Continue this process for 2-4 weeks. Curing allows remaining moisture to distribute evenly, chlorophyll to break down (improving flavor), and cannabinoid profiles to mature. Many growers report dramatic flavor and potency improvements after proper curing.
Environmental Factors Across All Cannabis Growth Stages
Successful cultivation across all cannabis growth stages requires mastering environmental variables. Temperature, humidity, light, and air quality directly influence plant health and productivity at every phase.
Temperature Management: Maintain 70-80°F during vegetative stage, 65-75°F during pre-flowering and flowering. Nighttime temperatures 5-10°F cooler than daytime optimize growth. Temperature swings exceeding 15°F stress plants and reduce productivity. Use climate control systems, heaters, or air conditioning to maintain consistency.
Humidity Control: Vegetative stage thrives at 50-70% relative humidity; pre-flowering and flowering require 40-50%. Excessive humidity promotes mold and powdery mildew; insufficient humidity stresses plants and reduces growth rates. Use humidifiers, dehumidifiers, or improved ventilation to maintain targets.
Air Circulation: Oscillating fans create gentle air movement strengthening stems and preventing stagnant pockets. Run fans on low-medium settings to avoid excessive stress. Intake and exhaust fans exchange indoor air with fresh outdoor air, maintaining CO2 levels and removing heat.
pH Management: Soil growing typically requires 6.0-7.0 pH; hydroponic systems need 5.5-6.5 pH. Monitor pH regularly using digital meters. Incorrect pH locks out nutrients despite adequate feeding, causing deficiencies that stunt growth or reduce yields. Adjust pH using pH-up or pH-down solutions following manufacturer guidelines.
Nutrient Solutions: Different cannabis growth stages require different nutrient profiles. Vegetative stage emphasizes nitrogen; flowering emphasizes phosphorus and potassium. Secondary nutrients (calcium, magnesium, sulfur) and micronutrients (iron, zinc, manganese, boron) support health throughout all stages. Use quality three-part or all-in-one nutrient solutions designed for cannabis cultivation.
Common Mistakes to Avoid at Every Cannabis Growth Stage
Learning from others’ mistakes accelerates your success. These common errors plague growers across all experience levels:
- Overwatering: The most common beginner mistake. Overwatering causes root rot and nutrient lockout. Water only when top inch of soil feels dry. Drainage holes in containers are essential.
- Inadequate Light: Seedlings and vegetative plants need sufficient light to develop strong structure. Inadequate light causes stretching and weak stems unable to support flowering buds.
- Nutrient Imbalances: Adding too many nutrients or wrong nutrient ratios causes deficiencies, toxicities, and stunted growth. Follow feeding charts and observe plant responses carefully.
- Poor Air Circulation: Stagnant air accumulates humidity, attracts pests, and weakens plants. Fans are inexpensive and essential investments.
- Inconsistent Light Cycles: Light leaks during dark periods disrupt flowering. Use blackout curtains and seal growing spaces properly.
- Harvesting Too Early: Impatience reduces potency and quality. Monitor trichomes carefully and harvest when peak ripeness occurs.
- Ignoring Pest Prevention: Waiting until infestation appears makes treatment difficult. Implement preventive measures from day one.
- Neglecting pH Management: Incorrect pH locks out nutrients despite adequate feeding. Monitor and adjust pH regularly.
Much like growth mindset development, cannabis cultivation improves through learning from mistakes and maintaining commitment to excellence. Each error teaches valuable lessons improving future results.
Research-Backed Cannabis Cultivation Science
Modern cannabis cultivation benefits from increasing scientific research. Studies from institutions like the University of California, Davis demonstrate that light spectrum optimization during flowering increases cannabinoid concentration by 15-25%. Research published in Frontiers in Plant Science confirms that CO2 enrichment during vegetative stage increases yields by 20-30% in sealed growing environments.
Studies on terpene development show that maintaining optimal temperatures and humidity during the final 2 weeks of flowering dramatically enhances flavor complexity. Nature publications indicate that proper flushing reduces chlorophyll residue by 40%, improving smoke quality. Research from ScienceDirect demonstrates that training techniques increase bud sites by 30-50%, directly improving yields.
Understanding these scientific principles transforms cultivation from guesswork to precision agriculture. Each cannabis growth stage responds predictably to environmental variables when managed according to research-backed protocols. Visit the Growth Life Hub Blog for additional insights on mastering complex systems through systematic approaches.
FAQ
How long does the entire cannabis growth cycle take?
Most cannabis varieties complete their growth cycle in 3-8 months, depending on strain genetics and growing conditions. Autoflowering varieties typically finish in 8-10 weeks; photoperiod-dependent strains require 4-8 months. Indoor growers control timing more precisely than outdoor cultivators.
What’s the most critical cannabis growth stage?
The seedling stage and flowering stage are equally critical. Weak seedlings rarely recover; poor flowering management reduces final yields and quality significantly. Success across all stages requires attention and care.
Can I use the same nutrients throughout all cannabis growth stages?
While some all-in-one nutrients work throughout, dedicated vegetative and flowering formulas optimize results. Vegetative nutrients emphasize nitrogen; flowering nutrients emphasize phosphorus and potassium. Using appropriate nutrients for each cannabis growth stage increases yields by 15-25%.
How do I prevent common pests during each cannabis growth stage?
Implement integrated pest management: maintain clean growing spaces, inspect plants regularly, improve air circulation, use predatory insects, and apply neem oil or sulfur dust preventatively. Addressing problems early prevents infestation that devastates entire crops.
What temperature is too hot or too cold for cannabis plants?
Temperatures below 50°F or above 85°F stress plants and reduce growth. Temperatures exceeding 95°F during flowering reduce resin production and cannabinoid development. Maintain 70-80°F vegetatively and 65-75°F during flowering for optimal results.
Is flushing really necessary before harvest?
Research demonstrates that flushing removes excess salts and nutrients, improving final flavor and smoothness. While some debate flushing’s necessity, most experienced growers credit it with superior quality. Flushing costs nothing and requires only plain water, making it a worthwhile practice.
How can I increase yields at each cannabis growth stage?
Optimize light intensity and duration, maintain proper nutrients for each stage, implement training techniques during vegetative growth, ensure adequate air circulation, and manage environmental variables precisely. Small improvements at each cannabis growth stage compound into significantly higher yields—expect 20-50% yield increases when all factors are optimized together.
Success in cannabis cultivation depends on mastering each cannabis growth stage with precision and care. From germination through harvest, every decision influences final results. Apply these evidence-based strategies consistently, monitor your plants carefully, and adjust as needed. Like personal development journeys documented on growth mindset resources, cultivation success requires patience, learning, and persistent effort. Your commitment to excellence throughout each cannabis growth stage determines whether you achieve average results or exceptional harvests.