How to Grow Aloe Vera Indoors: Complete Gardening Expert Guide
Aloe vera is one of the most rewarding plants to cultivate indoors, offering both aesthetic beauty and practical health benefits. This succulent thrives in indoor environments when given proper care, making it an excellent choice for beginners and experienced gardeners alike. Whether you’re interested in personal growth through nurturing living things or simply want a low-maintenance plant for your home, aloe vera delivers on all fronts.
Indoor aloe vera cultivation teaches patience, responsibility, and the rewards of consistent care—qualities that extend far beyond gardening. Many people find that maintaining a thriving aloe plant connects them to nature while improving their living space. This comprehensive guide will walk you through every step of successfully growing aloe vera indoors, from selecting the right plant to troubleshooting common problems.
Understanding Aloe Vera Basics
Aloe vera (Aloe barbadensis miller) is a succulent plant native to the Arabian Peninsula, characterized by thick, fleshy leaves that store water and gel. This natural adaptation makes aloe vera exceptionally drought-tolerant, a trait that translates perfectly to indoor growing conditions. The plant’s ability to thrive with minimal intervention makes it ideal for busy individuals or those new to indoor gardening.
The gel inside aloe vera leaves contains over 75 active compounds, including vitamins, minerals, and amino acids. This makes the plant valuable not just as a decorative element but as a functional addition to your home. Understanding the plant’s natural habitat—arid, well-draining environments with plenty of sunlight—is crucial for replicating these conditions indoors.
Aloe vera plants can live for many years when properly cared for, often becoming more attractive and productive as they mature. Developing a growth mindset about plant care helps you learn from mistakes and continuously improve your techniques. Most indoor aloe plants reach maturity between three and four years old, at which point they begin producing flowers and pups (baby plants).
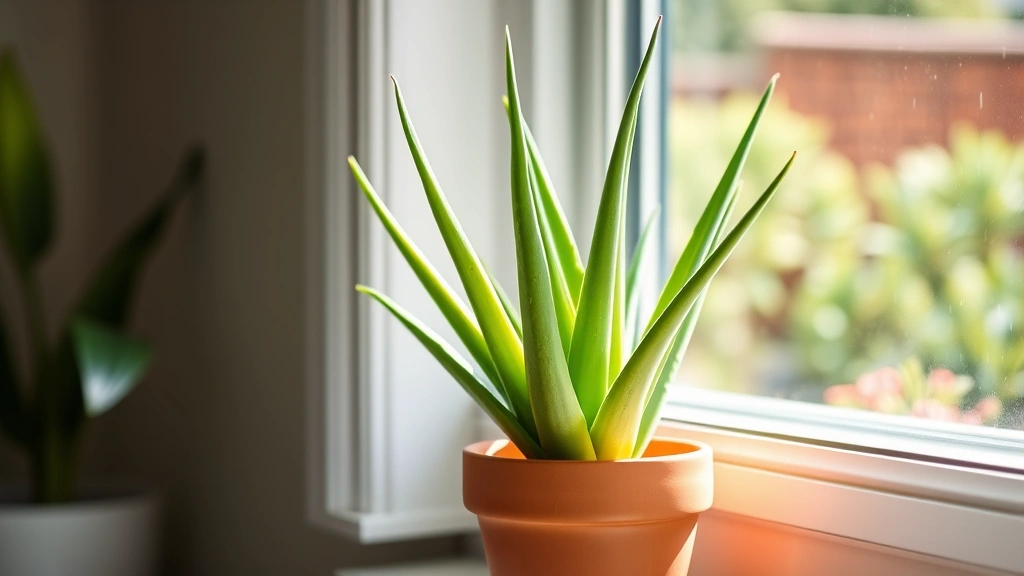
Selecting the Right Container and Soil
Container selection is absolutely critical for aloe vera success. The pot must have drainage holes—this is non-negotiable. Aloe vera is susceptible to root rot, which occurs when water sits around the roots for extended periods. A terracotta or clay pot is ideal because these materials are porous and allow soil to dry more quickly than plastic containers.
Size matters significantly. Choose a container only slightly larger than your aloe plant’s root ball. A pot that’s too large retains excess moisture and increases root rot risk. For a mature aloe plant, an 6-8 inch pot is typically appropriate. When repotting, move up only one size at a time.
Soil composition is equally important as the container itself. Standard potting soil retains too much moisture for aloe vera. Instead, use cactus or succulent-specific potting mix, or create your own blend by combining regular potting soil with perlite or coarse sand in a 1:1 ratio. This ensures excellent drainage while maintaining enough nutrients for growth. Some gardeners add an additional layer of gravel at the pot’s bottom for extra drainage assurance.
When repotting, handle the plant gently and allow the soil to dry completely before watering. This transition period, typically lasting 3-5 days, helps the plant recover from the stress of repotting. Visit our Growth Life Hub Blog for more plant care insights and personal development strategies.
Lighting Requirements for Indoor Growth
Aloe vera demands bright, indirect light to thrive indoors. This succulent evolved under intense desert sun, so it requires significantly more light than typical houseplants. Ideally, place your aloe vera near a south-facing or west-facing window where it receives at least 6-8 hours of bright light daily.
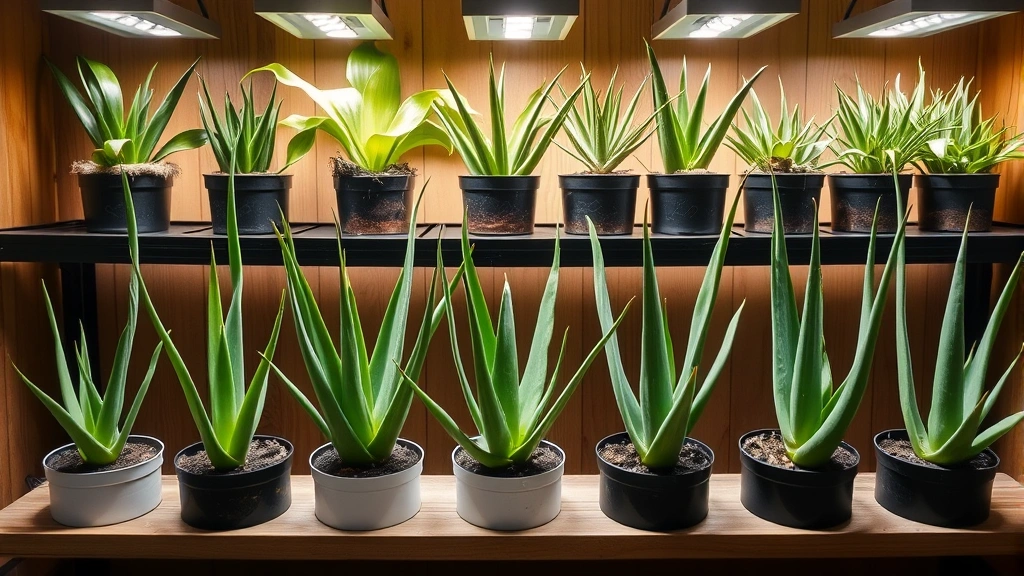
If natural light is limited in your home, consider supplementing with LED grow lights designed for succulents. Position grow lights 6-12 inches above the plant, operating them for 12-14 hours daily. This approach has become increasingly popular among indoor gardeners with limited natural light access.
Insufficient light causes aloe vera to become pale, elongated, and weak—a condition called etiolation. The plant essentially stretches toward light sources, becoming unstable and less attractive. If you notice this happening, gradually increase light exposure over several weeks rather than making sudden changes.
Rotation is beneficial. Turn your aloe vera plant 180 degrees every two weeks to ensure even light exposure on all sides. This promotes balanced, symmetrical growth and prevents the plant from leaning toward the light source. Window light intensity varies seasonally, so monitor your plant’s appearance and adjust placement as needed throughout the year.
Watering Your Indoor Aloe Vera
Watering is where most indoor aloe vera failures occur. The fundamental rule is simple: water less frequently than you think necessary. Aloe vera stores water in its leaves, making it far more drought-tolerant than moisture-loving plants. Overwatering is the primary cause of aloe vera decline in indoor settings.
During the growing season (spring and summer), water thoroughly but only when the soil is completely dry. This typically means watering every 2-3 weeks, though frequency depends on your environment’s humidity, temperature, and light conditions. Stick your finger 2 inches into the soil; if it feels moist, wait another week before watering.
In fall and winter, reduce watering frequency significantly. Many indoor aloe vera plants need water only once monthly during these cooler months. The plant enters a dormant phase and requires less moisture. Err on the side of underwatering rather than overwatering—aloe vera can survive extended dry periods but cannot recover from prolonged waterlogging.
When you do water, use the “soak and dry” method. Water thoroughly until it drains from the bottom, then allow the pot to drain completely. Never let the plant sit in standing water. If using a saucer under the pot, empty it immediately after watering. This practice prevents root rot and ensures healthy development.
Water quality matters too. If your tap water is heavily chlorinated or fluoridated, consider using filtered or distilled water. Some gardeners collect rainwater specifically for their succulents. Room-temperature water is preferable to cold water, which can shock the plant’s system.
Temperature and Humidity Control
Aloe vera prefers warm temperatures between 55-80°F (13-27°C), with optimal growth occurring at 70-75°F. The plant is sensitive to cold and should never be exposed to temperatures below 50°F. This makes indoor cultivation ideal, as most homes maintain comfortable temperatures year-round.
Protect your aloe vera from cold drafts near windows during winter months. Similarly, keep the plant away from heating vents and air conditioning units that create temperature fluctuations. Sudden temperature changes stress the plant and can trigger various health issues.
Unlike tropical houseplants, aloe vera actually prefers low humidity. The plant’s evolutionary adaptation to arid climates means it thrives in dry indoor air. In fact, high humidity increases disease risk, particularly fungal infections. Most homes naturally provide adequate humidity levels for aloe vera success.
If you live in an exceptionally humid climate, ensure excellent air circulation around your plant. A small fan running a few hours daily can help prevent moisture accumulation on the leaves. Avoid misting your aloe vera, as this adds unnecessary moisture to the foliage and increases disease risk.
Propagation and Expansion
One of the most rewarding aspects of growing aloe vera indoors is propagation—creating new plants from your original specimen. Mature aloe plants produce pups, which are small offshoots that emerge from the base. When these pups develop roots (typically when they reach 2-3 inches tall), they can be separated and potted individually.
To propagate, carefully remove the pup from the mother plant using a clean, sharp knife. Allow the cut to dry for 3-5 days before planting in dry cactus soil. Water sparingly for the first 2-3 weeks while roots establish. This propagation process teaches patience and creates opportunities to share plants with friends and family.
Leaf propagation is also possible but less reliable. Snap off a healthy leaf, allow it to dry for several days, then place it on moist cactus soil. New roots and shoots may develop, but success rates are lower than with pup propagation. Both methods connect you to the plant’s natural reproduction cycle.
Propagation offers an excellent opportunity for growth-oriented thinking—expanding your collection while understanding the biological processes driving plant development. Each new plant represents your accumulated knowledge and care skills.
Common Problems and Solutions
Despite their hardiness, indoor aloe vera plants occasionally encounter problems. Root rot is the most common issue, caused by overwatering or poor drainage. Signs include soft, translucent leaves and a mushy base. If caught early, remove the plant from its pot, trim away affected roots with a clean knife, repot in fresh dry soil, and refrain from watering for 2-3 weeks.
Pests like mealybugs and spider mites occasionally infest indoor aloe plants. These appear as tiny white cotton-like clusters or fine webbing on leaves. Treat infestations by wiping affected areas with rubbing alcohol on a cotton swab, or use neem oil spray following product instructions. Integrated pest management approaches minimize chemical use while effectively controlling pests.
Leaf spots or discoloration often indicate fungal or bacterial issues, typically resulting from excessive moisture. Improve air circulation, reduce watering frequency, and remove affected leaves. Powdery mildew appears as a white coating on leaves; address this by increasing air circulation and reducing humidity.
Pale or yellowing leaves may indicate insufficient light, nutrient deficiency, or pest damage. Evaluate your lighting situation first. If light is adequate, consider feeding with a diluted succulent fertilizer during growing season (spring and summer only). Most indoor soils contain sufficient nutrients for several years, so fertilizing should be minimal.
Harvesting and Using Your Aloe
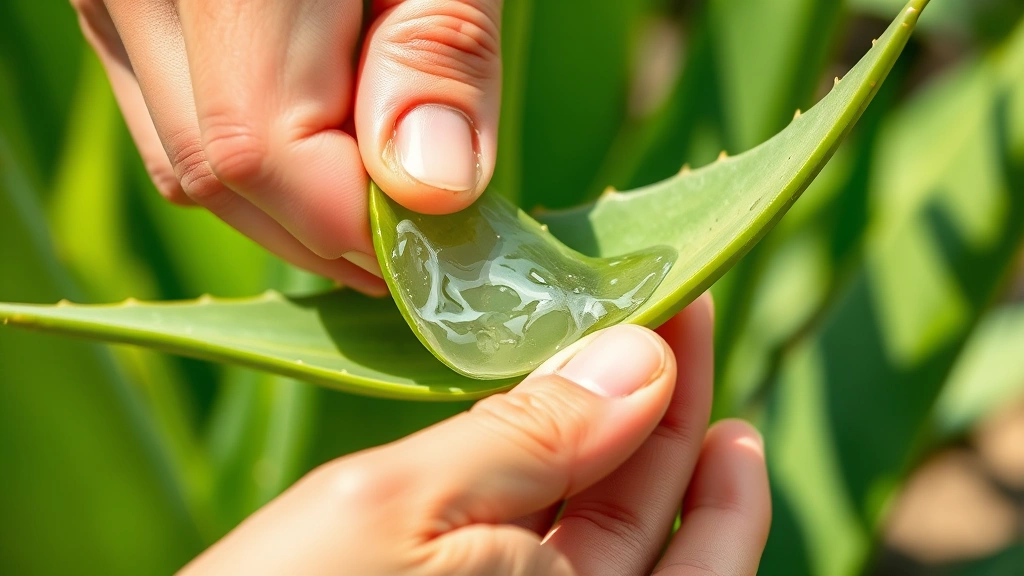
Once your aloe vera plant reaches maturity (typically 3-4 years old), you can harvest gel for personal use. The outer, lower leaves contain the most concentrated gel and should be harvested first. Snap off leaves close to the base using a clean, sharp motion.
Allow harvested leaves to sit upright for 10-15 minutes, allowing bitter yellow latex to drain (this latex can cause digestive upset if ingested). Scoop out the clear gel using a spoon, discarding the leaf material. The gel can be used immediately for skin care, minor burns, or ingested for digestive support.
Store harvested gel in an airtight container in the refrigerator for up to two weeks, or freeze in ice cube trays for longer storage. Never harvest more than one-third of the plant at a time; this ensures continued growth and plant health. Regular, moderate harvesting actually encourages bushier growth and pup production.
Many people find that maintaining their own aloe vera plant and harvesting gel regularly creates a meaningful connection to natural wellness practices. This hands-on approach to health and self-care aligns with broader growth and improvement philosophies, extending personal development into daily wellness routines.
Frequently Asked Questions
How often should I water my indoor aloe vera?
Water only when soil is completely dry, typically every 2-3 weeks in growing season and once monthly in winter. The “soak and dry” method is most effective, ensuring thorough watering followed by complete drainage.
Can aloe vera survive in low light?
Aloe vera requires bright light to thrive. Low light causes etiolation (stretching) and pale appearance. If natural light is insufficient, supplement with LED grow lights positioned 6-12 inches above the plant for 12-14 hours daily.
What’s the best soil for indoor aloe vera?
Use cactus or succulent-specific potting mix, or create a blend of regular potting soil mixed 1:1 with perlite or coarse sand. Excellent drainage is essential to prevent root rot.
How do I know if my aloe vera has root rot?
Signs include soft, translucent leaves, mushy base, and soil that remains wet. If detected early, remove the plant, trim affected roots, repot in fresh dry soil, and wait 2-3 weeks before watering.
When can I harvest aloe vera gel?
Begin harvesting when the plant reaches maturity at 3-4 years old. Harvest outer, lower leaves only, never removing more than one-third of the plant at once.
Is aloe vera toxic to pets?
The yellow latex inside leaves is toxic to dogs and cats, though the clear gel is generally safe. Keep harvested leaves and gel away from pets, and consult a veterinarian if ingestion occurs.
How do I propagate aloe vera pups?
When pups reach 2-3 inches with visible roots, carefully remove them from the mother plant. Allow cuts to dry 3-5 days, then plant in dry cactus soil. Water sparingly until roots establish after 2-3 weeks.
Growing aloe vera indoors represents more than simple plant cultivation—it’s a commitment to patience, consistent care, and observation. Each leaf that unfurls, each pup that emerges, and each harvest of healing gel reinforces the rewards of dedicated nurturing. Whether you’re beginning your indoor gardening journey or expanding an existing collection, aloe vera offers accessible success and tangible benefits. Start with these expert-tested techniques, remain patient through the learning process, and watch your indoor aloe vera flourish into a thriving, productive plant that enhances your home for years to come.